Imagine the smell of freshly baked Scali bread wafting through your kitchen, a delightful aroma that promises a delicious treat. But what if that bread could be even better?
That’s where proofing comes in. Proofing Scali bread is a crucial step that can elevate your bread from good to irresistible. It’s the secret to achieving that perfect texture and flavor, and it’s simpler than you might think. Curious about how you can master this technique and take your Scali bread to the next level?
Keep reading, and you’ll discover the tips and tricks that will make your homemade bread the envy of all your friends. Get ready to impress not just your taste buds, but everyone who takes a bite.
Credit: www.guttenplan.com
Scali Bread Origins
Scali bread, a delightful Italian loaf, has a rich history. It originates from the vibrant Italian-American communities in Boston. This bread is known for its braided shape and sesame seed topping. Its roots trace back to Italian immigrants who settled in Massachusetts.
These immigrants brought their traditional recipes to the New World. Scali bread emerged as a favorite in local bakeries. Over time, it became a staple in many households. Its unique texture and flavor set it apart from other breads.
History Of Scali Bread
Scali bread’s history is deeply tied to Boston’s Italian neighborhoods. Italian families shared their baking traditions. As these communities grew, their culinary customs spread. Scali bread became a symbol of cultural heritage.
Local bakeries played a key role. They preserved and popularized this unique bread. Families passed down recipes through generations. This ensured Scali bread’s place in Boston’s food culture.
Ingredients Used In Scali Bread
Traditional Scali bread uses simple ingredients. Flour, water, yeast, and salt form its base. Olive oil adds richness and flavor. Sesame seeds provide a nutty taste and aroma.
These ingredients create a soft and chewy texture. The bread’s golden crust offers a delightful crunch. Each component complements the others, resulting in a delicious loaf.
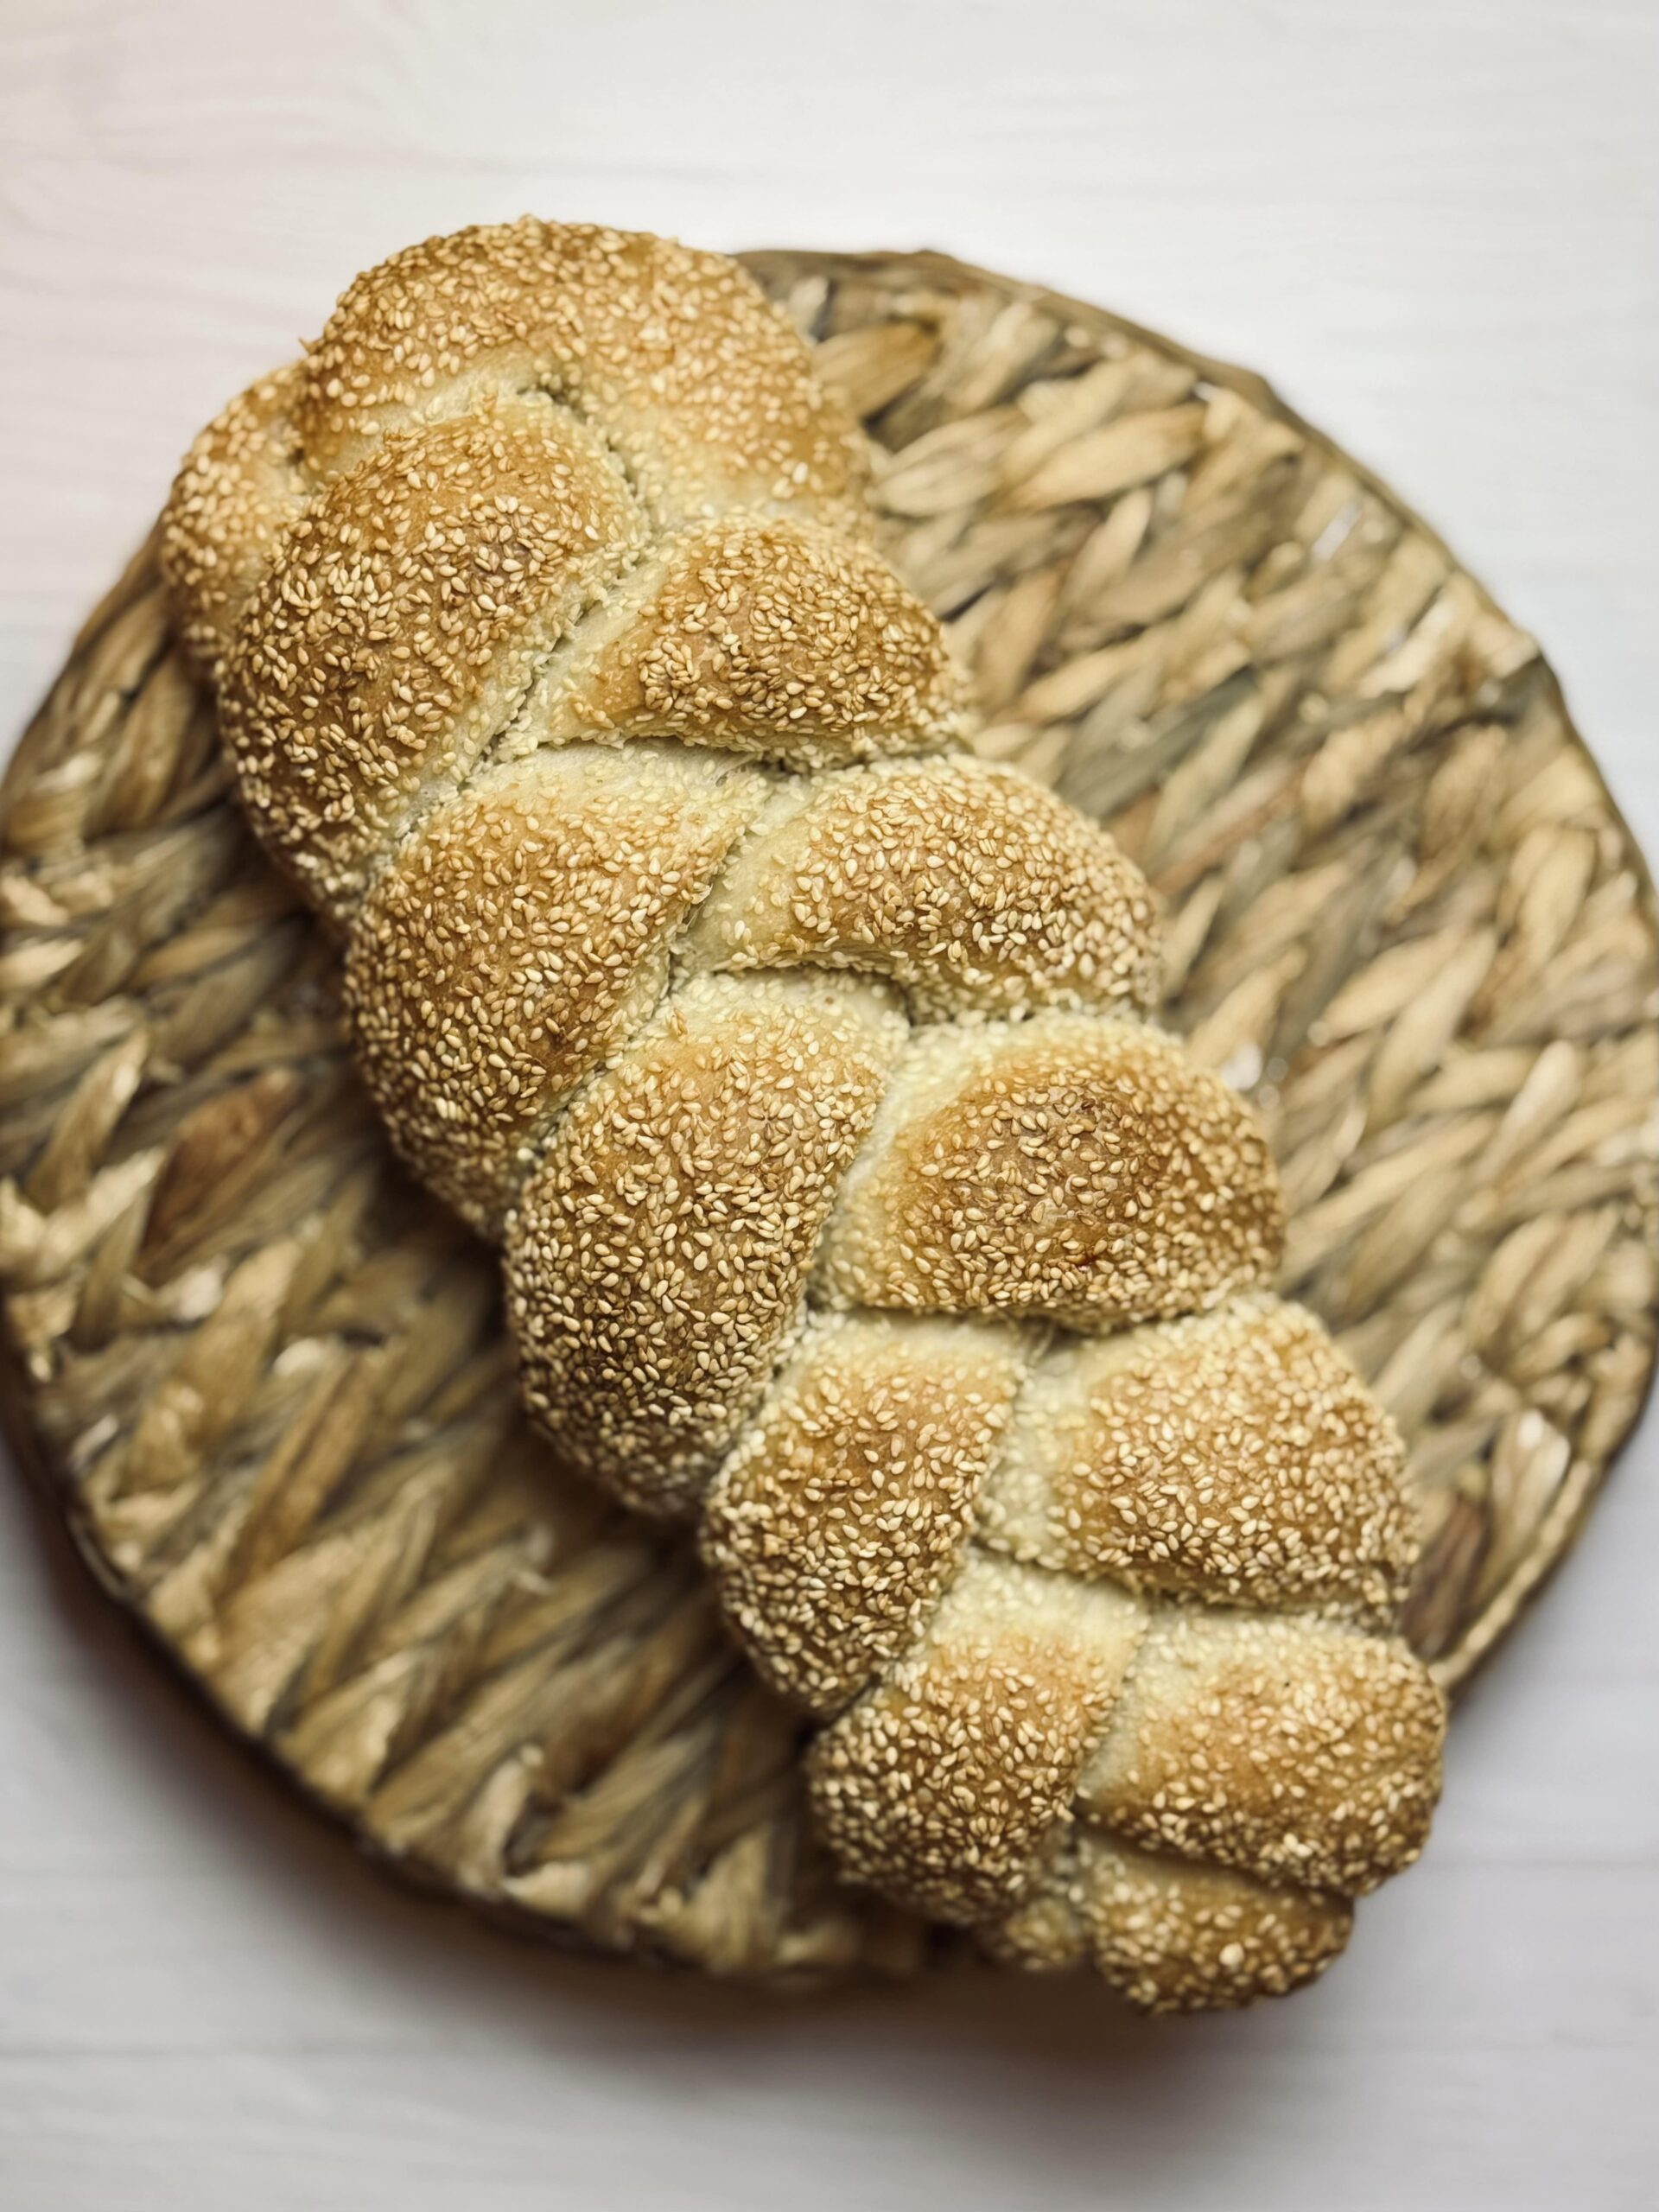
Unique Characteristics Of Scali Bread
Scali bread is known for its braided design. The braid adds visual appeal and texture. Sesame seeds give it a distinctive look and flavor.
This bread is versatile. It pairs well with many dishes. Its soft crumb makes it ideal for sandwiches. The crust holds up well to toppings. Scali bread’s unique traits make it a favorite choice.
Essential Ingredients
Scali bread requires careful proofing to achieve its soft texture. Start by letting the dough rise until it doubles. Warm, draft-free places work best. Watch closely to avoid over-proofing, which leads to dense bread.
Creating the perfect Scali bread begins with understanding the essential ingredients. Each component plays a crucial role in the outcome of your loaf. A well-thought-out selection will make your bread stand out, offering a delightful texture and taste that will have everyone asking for more.
Flour: The Foundation Of Your Bread
Flour is the backbone of Scali bread. Opt for high-quality bread flour, which contains a higher protein content. This helps in forming a strong gluten network, crucial for that chewy texture you adore. Have you ever wondered why your bread sometimes lacks that perfect chew? The right flour choice makes all the difference.
Water: The Balancer
Water binds the ingredients, creating the dough. Use lukewarm water to activate the yeast without shocking it. How many times have you added too much water and ended up with a sticky mess? Measure carefully to maintain the dough’s integrity.
Yeast: The Rise Maker
Yeast is essential for the bread’s rise. Active dry yeast is a popular choice for its reliability. Have you experienced dough that just wouldn’t rise? Ensure your yeast is fresh and active for the best results.
Salt: The Enhancer
Salt enhances flavor and strengthens the dough. A pinch of salt can elevate your bread from good to great. Did you know that skipping salt can make your bread taste flat? It’s a small addition with a big impact.
Sugar: The Feeder
Sugar feeds the yeast, contributing to the bread’s rise and adding a hint of sweetness. Use just enough to complement the savory notes. Ever tried bread that was too sweet? Balance is key in achieving that classic Scali flavor.
Olive Oil: The Softener
Olive oil adds moisture and richness. It helps soften the crust and enrich the flavor profile. Have you noticed how some bread has a tender crumb? Olive oil is your secret to achieving that delicate texture.
Sesame Seeds: The Signature Touch
Sesame seeds are more than a garnish. They add a nutty flavor and a delightful crunch to each bite. Do you find yourself craving that distinctive Scali bread crunch? Sesame seeds provide that unique finishing touch. By carefully selecting and balancing these ingredients, you set the stage for making exceptional Scali bread. Each component has its role, just like pieces in a puzzle, coming together to create something truly special. What ingredients will you focus on to elevate your next bake?
Tools And Equipment
Discover the essential tools for proofing Scali bread. A dough scraper helps shape the dough perfectly. A proofing basket supports the dough’s rise. With these, achieve airy and flavorful Scali bread at home.
Proofing Scali bread is a delicate process that requires the right tools and equipment to achieve that perfect, airy texture. Each piece of equipment plays a crucial role in ensuring your Scali bread rises beautifully and develops its characteristic flavor. Let’s break down the essential tools you need for proofing Scali bread, ensuring your baking experience is smooth and successful.
1. Mixing Bowl
A sturdy mixing bowl is fundamental for combining your ingredients. Opt for a non-reactive material like glass or stainless steel. These materials prevent any unwanted flavors from seeping into your dough.
2. Kitchen Scale
Accuracy is key in baking. A kitchen scale helps you measure your ingredients precisely. This ensures consistency in your dough, leading to better results every time you bake.
3. Dough Scraper
A dough scraper is a versatile tool that helps you handle sticky dough with ease. It’s perfect for cutting and transferring dough without disrupting its texture. You’ll find it invaluable as you work with your Scali bread.
4. Proofing Basket
A proofing basket, or banneton, supports the dough as it rises. It helps maintain the shape and provides a lovely pattern on the crust. The natural materials like rattan wick away moisture, giving your bread a perfect crust.
5. Plastic Wrap Or Proofing Cloth
Covering your dough while it proofs is essential to prevent it from drying out. Plastic wrap provides an airtight seal, while a proofing cloth allows for some breathability. Choose based on your preference and environment.
6. Baking Stone Or Steel
To achieve that crispy crust, baking your bread on a stone or steel is ideal. These surfaces retain heat well, ensuring your bread bakes evenly. Place them in your oven ahead of time to preheat properly.
7. Oven Thermometer
Oven temperatures can vary, so an oven thermometer ensures your settings are accurate. This tool helps you maintain the right temperature, crucial for baking Scali bread to perfection.
8. Sharp Knife Or Lame
Scoring your bread before baking is essential for proper expansion. A sharp knife or lame provides clean cuts, allowing the bread to rise uniformly. This step also adds a decorative touch to your loaf. These tools make the process of proofing Scali bread not only feasible but also enjoyable.
Have you ever experienced the joy of watching dough rise and transform into a beautiful loaf? With the right equipment, you’ll not only improve your results but also enhance your baking journey. Start with these essentials, and you’ll be on your way to mastering the art of Scali bread.
Preparing The Dough
Proofing Scali bread begins with carefully preparing the dough. Mix ingredients until smooth and elastic. Let the dough rest in a warm place until it doubles in size, ensuring a soft, airy texture.
Preparing the dough for Scali bread is a crucial step that sets the foundation for its unique texture and flavor. This is where your journey to creating the perfect loaf begins. With a few simple steps, you can master the art of dough preparation and ensure your Scali bread turns out just right.
Mixing Ingredients
Start by gathering all your ingredients: flour, water, yeast, sugar, salt, and olive oil. These are the building blocks of your dough. Measure each ingredient precisely. Even a small difference can affect the outcome. Combine the dry ingredients in a large mixing bowl.
Add the wet ingredients gradually. Mix until everything comes together into a shaggy dough. Don’t rush this step. Let the dough rest for a few minutes. This allows the flour to absorb the water, making the dough easier to handle.
Kneading Techniques
Kneading is where the magic happens. It transforms the dough from a sticky mess into something smooth and elastic. Place the dough on a lightly floured surface. Use the heels of your hands to push the dough away from you, then fold it back over itself. Continue kneading for about 10 minutes. You’ll feel the dough changing under your hands, becoming more resilient and less sticky.
If you’ve ever felt stressed, kneading is surprisingly therapeutic. Feel the dough transform as you work it, and imagine the delicious bread it will become. How do you know when you’re done? The dough should be smooth, elastic, and slightly tacky to the touch. It should spring back when you poke it with a finger. Once kneaded, place the dough back in the bowl.
Cover it with a damp cloth and let it rise. This resting period is crucial for developing flavor and structure. Do you have a favorite kneading technique or secret ingredient? Share it in the comments! Your insights might just inspire someone else on their bread-making journey.
First Rise
Proofing Scali bread involves letting the dough rise until it doubles in size. Place the dough in a warm spot, covered with a damp cloth. This process ensures a light and airy texture, perfect for baking.
Proofing Scali bread is an art that begins with the crucial stage known as the ‘First Rise’. This step is about allowing your dough to expand, developing its flavor and texture. It’s the moment where patience meets anticipation. Your kitchen transforms into a nurturing environment for the dough’s development. But how can you ensure that your Scali bread rises perfectly? Let’s dive into the essentials of the first rise.
Ideal Conditions
Creating the right environment for your dough is key. Temperature plays a vital role—aim for a warm spot, around 75-80°F (24-27°C). Too cold, and your dough will sulk, refusing to rise. Too hot, and it may rush through its development, losing flavor.
Humidity matters too. Ever noticed how your dough rises differently in winter versus summer? A slightly humid environment can encourage a better rise. Think about using a damp towel over your bowl or placing it in a slightly steamy kitchen.
Time Recommendations
Timing is everything in baking. For Scali bread, you’re looking at about 90 minutes to 2 hours for the first rise. But don’t just rely on the clock. Visual cues are important. Has the dough doubled in size? If yes, it’s ready for the next step. Remember, bread making is not a race. Rushed dough might lack the airy texture you crave.
Check for the dough’s springiness. A gentle poke should leave an indentation that slowly fills back in. Are you observing these changes in your dough? What if you adjusted your technique slightly? The first rise is your chance to set the stage for delicious results. So, give your dough the time it deserves and watch it transform.
Credit: thesourdoughbaker.com
Shaping The Bread
The art of shaping Scali bread is where the magic truly begins. This part of the process is not just about forming the dough into a loaf, but about giving it character and texture. As you shape the bread, you are setting the stage for its final transformation into a delicious masterpiece. It’s an opportunity to put your personal touch on the bread, making each loaf unique.
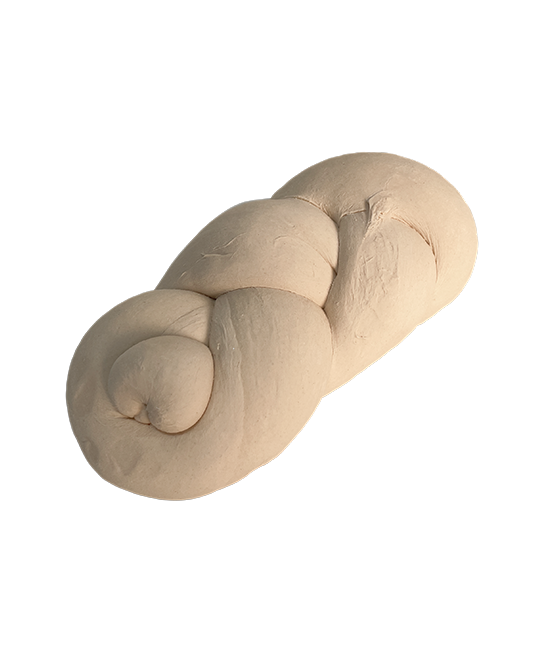
Braiding The Dough
Braiding the dough is a fun and creative step. It’s like crafting a piece of art that you can eat. Begin by dividing your dough into three equal parts. Ensure each piece is smooth and even.
Roll each portion into a long strand, about 18 inches in length. Then, lay them side by side. Think about the braids you might have seen in hair; the technique is quite similar.
Start braiding from the middle, crossing the strands over each other. Keep the braid tight yet gentle, allowing the dough to expand during baking. This will give your Scali bread its distinctive pattern.
Final Adjustments
Once braided, take a moment to make final adjustments. Look at the dough and see if any strands need a little more attention. It’s these small tweaks that make a big difference.
Consider the texture and firmness. Does it feel right? If the dough seems uneven, gently adjust the strands to ensure they are uniform.
Lastly, think about the presentation. Is the braid lying flat and even? Remember, the way you shape your bread will affect its final appearance and taste.
As you shape your Scali bread, think about the connection between your hands and the dough. What story is your bread telling? The shaping process is your chance to create something memorable and delicious. Embrace each twist and turn, and watch as your loaf comes to life. What insights have you gained from shaping your Scali bread? Share your thoughts and experiences in the comments below!
Second Rise
Properly proofing Scali bread involves allowing it to rise until doubled in size, ensuring fluffy texture. Cover with a damp cloth and let it rest in a warm spot for optimal results. Be patient to achieve the perfect airy consistency.
The ‘Second Rise’ is a crucial step in baking Scali bread, ensuring that your loaf achieves the perfect texture and flavor. This rise is where the dough develops its character, allowing the yeast to do its work once more. By monitoring the dough carefully, you can enhance its elasticity and ensure it rises optimally.
Checking Dough Elasticity
Elasticity is a key indicator of well-proofed dough. Gently press your finger into the dough to test it. If the indentation slowly springs back, your dough is ready. Don’t rush this process. Let the dough tell you when it’s ready, rather than sticking strictly to the clock. Think of it like waiting for a friend to arrive; you watch for signs they’re near rather than staring at the time.
Optimal Duration
Timing can make or break your Scali bread. Generally, the second rise can take anywhere from 30 minutes to 2 hours. Factors like room temperature and humidity can affect this duration. Keep an eye on the dough rather than the clock. In colder months, you might find your dough takes a bit longer. Consider cozying it up with a towel or placing it in a slightly warmer spot.
Each time you bake, remember that dough, much like people, has its own mood. Adjust based on what you see and feel. Have you ever waited for dough to rise, only to find it needed more time? Patience is key in achieving that perfect loaf of Scali bread.
Baking Tips
Proofing Scali bread involves letting the dough rise until it doubles in size. Cover it with a damp cloth to keep it moist. Ideal proofing temperature is around 75°F, ensuring a soft and fluffy texture. Check with a gentle poke; if it springs back slowly, it’s ready to bake.
When it comes to crafting the perfect Scali bread, the magic truly happens in the baking process. The right techniques can elevate your bread from good to extraordinary. Let’s dive into some essential baking tips to ensure your Scali bread turns out perfect every time.
Oven Settings
Getting your oven settings right is crucial for Scali bread. Preheat your oven to 400°F (about 200°C). A hot oven ensures the bread rises properly and forms a beautiful crust. Use an oven thermometer for accuracy. Ovens can be tricky, and their temperature gauges aren’t always reliable. You want to make sure you’re baking at the correct temperature to avoid a dense loaf. Consider using a baking stone or a heavy-duty baking sheet. These tools help evenly distribute heat and contribute to the bread’s crispy exterior.
Monitoring Progress
Keep a close eye on your bread during baking. Scali bread typically takes about 20-25 minutes. However, ovens vary, so watch for that golden brown crust. Tap the bottom of the loaf lightly; a hollow sound indicates it’s ready. If you hear a dull thud, give it a few more minutes. Resist the urge to open the oven door frequently. Each time you open it, the temperature drops.
Trust your timer and visual cues instead. Have you ever noticed how something as simple as a slight temperature change can affect your baking? It’s fascinating how precise the art of baking can be. Incorporate these baking tips into your routine and watch your Scali bread transform. Remember, the joy of baking comes not only from the result but the process itself. Are you ready to experiment and enhance your baking skills?
Cooling And Serving
After baking Scali bread, the cooling process is crucial. It ensures the bread maintains its texture and flavor. Cooling allows the crust to set, giving it that delightful crunch. Let’s explore the steps for cooling and serving your Scali bread.
Resting Period
Once your Scali bread is out of the oven, let it rest. Place the loaf on a wire rack. This prevents the bottom from becoming soggy. Leave it for at least 30 minutes. This time allows the steam to escape. The crust will firm up, enhancing the bread’s texture.
Resist slicing it right away. Cutting too soon may result in a gummy interior. Patience pays off. The resting period makes all the difference.
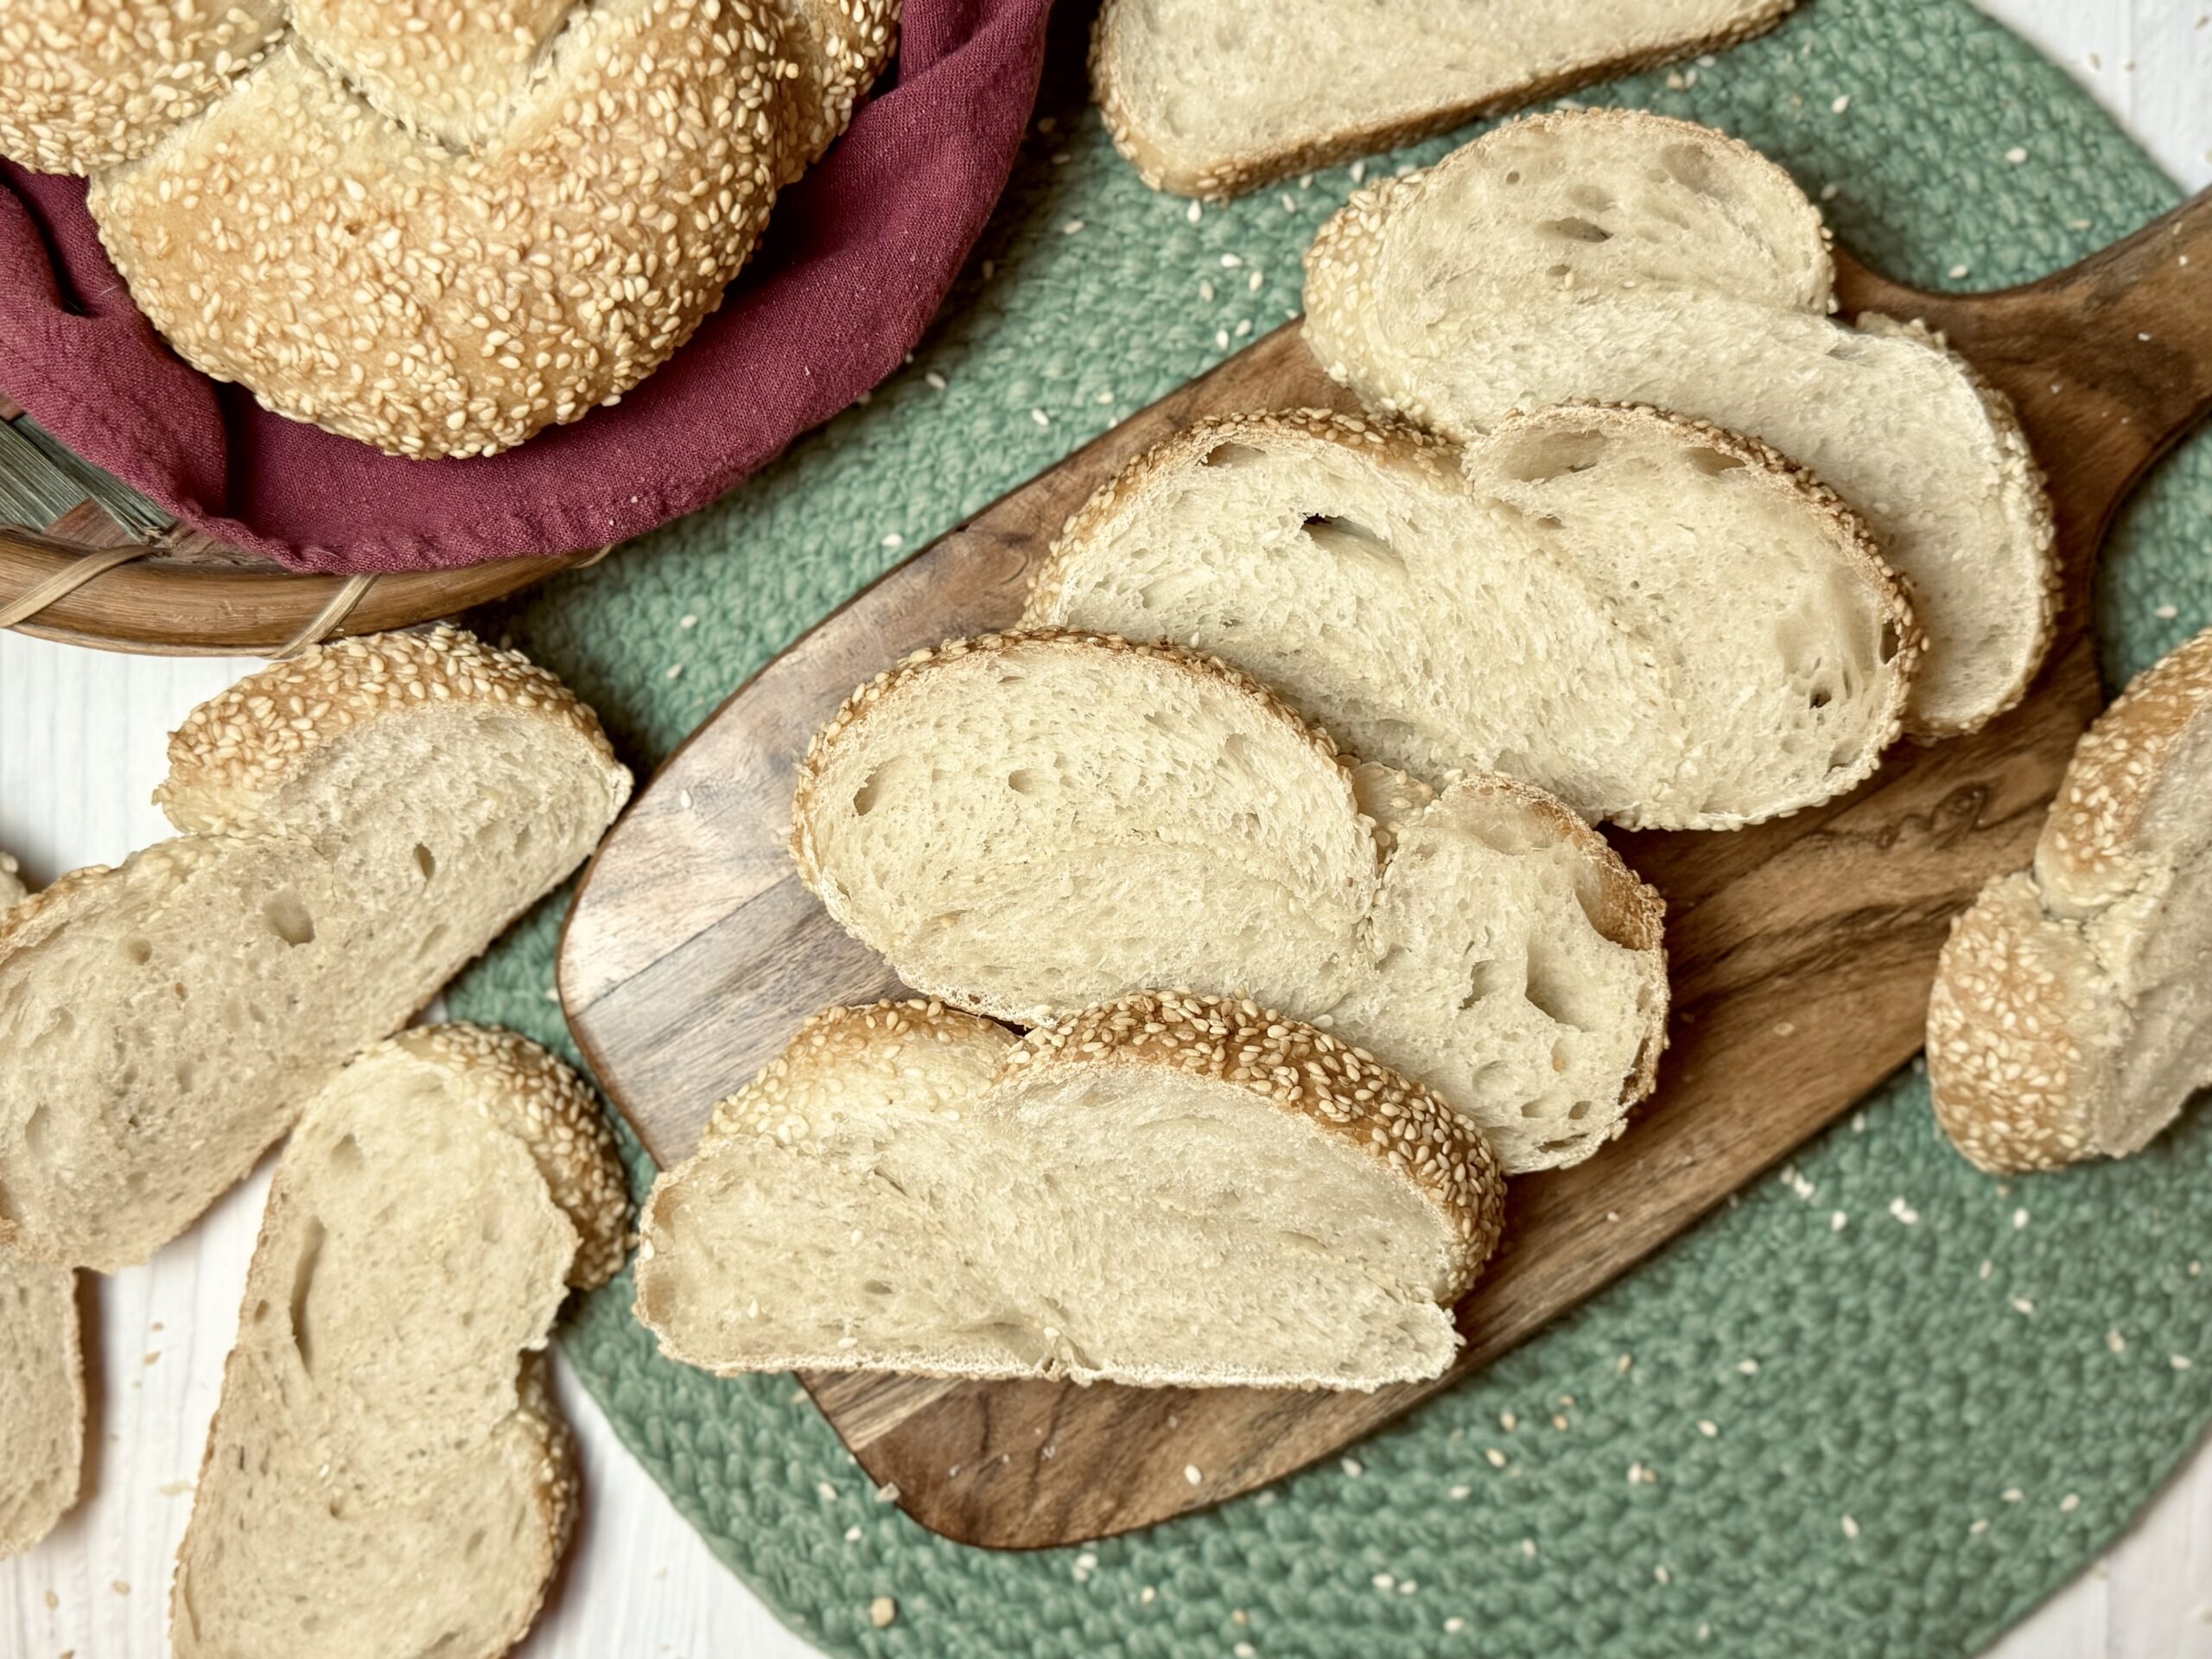
Serving Suggestions
Scali bread pairs well with many dishes. Serve it alongside pasta or soups. Its hearty texture complements rich sauces. Enjoy it with olive oil and herbs. A simple yet delicious option.
Consider making sandwiches with it. The bread’s structure holds fillings well. Or, toast slices for breakfast. Spread with butter or jam for a tasty start to the day.
Credit: thesourdoughbaker.com
Frequently Asked Questions
What’s The Best Way To Proof Bread?
Proof bread in a warm, draft-free area. Cover dough with a damp cloth or plastic wrap. Ensure the temperature is around 75-85°F (24-29°C) for optimal yeast activity. Allow dough to double in size for perfect proofing. Consistent warmth and humidity are key for successful bread proofing.
What Makes Scali Bread Different?
Scali bread is distinct due to its soft, airy texture and sesame seed crust. It’s an Italian-American bread, originating from Boston. The braided loaf offers a slightly sweet flavor, making it unique. Perfect for sandwiches or as a side, its sesame seeds add a nutty taste.
How Long Should You Proof A Loaf Of Bread?
Proof a loaf of bread for 1 to 2 hours until it doubles in size. Room temperature affects proofing time. Warmer rooms speed up the process, while cooler rooms slow it down. Keep dough covered to prevent drying out. Adjust time based on your specific recipe and environment.
How Do You Know When Your Bread Is Properly Proofed?
Gently press the dough; it should spring back slowly and leave a slight indent. This indicates proper proofing. The dough should feel light and airy, not dense. Check for a slight wobble when you shake the tray. These signs confirm your bread is ready for baking.
Final Words
Baking Scali bread at home is rewarding and fun. The proofing process is crucial for perfect texture. Follow these simple steps for success. Ensure the dough rises well in a warm spot. Keep an eye on time to prevent over-proofing.
This ensures your bread is soft and delicious. Enjoy fresh, homemade Scali bread with family and friends. Practice makes perfect, so keep experimenting. Each loaf will improve your skills. Happy baking!
Leave a Reply